A Step-by-Step Guide on How to Access the Sunny Boy User Interface via the Self-Hosted Wi-Fi
The Sunny Boy US line of residential PV inverter has a detailed graphical user interface used for commissioning and local monitoring. It is commonly accessed via the inverter’s self-hosted Wi-Fi network. This post walks through the required steps to use this connection method.
The Sunny Boy US user interface
There are multiple ways for an installer or homeowner to access the graphical user interface of the Sunny Boy. The most commonly used method for installers is connecting via the inverter’s self-hosted Wi-Fi network, labeled method 1 in Figure 1. Any device that can join a 2.4 GHz Wi-Fi network and open a web browser can utilize this option. The Sunny Boy, with DC or AC power or both applied, will begin broadcasting its Wi-Fi network. The network name is “SMA1234567890” where the digits 1-0 represent the device serial number. The serial number is found on the Connection Unit label on the lower right side of the inverter body. An example of the label, and corresponding Wi-Fi network name for this inverter are shown in Figure 2.
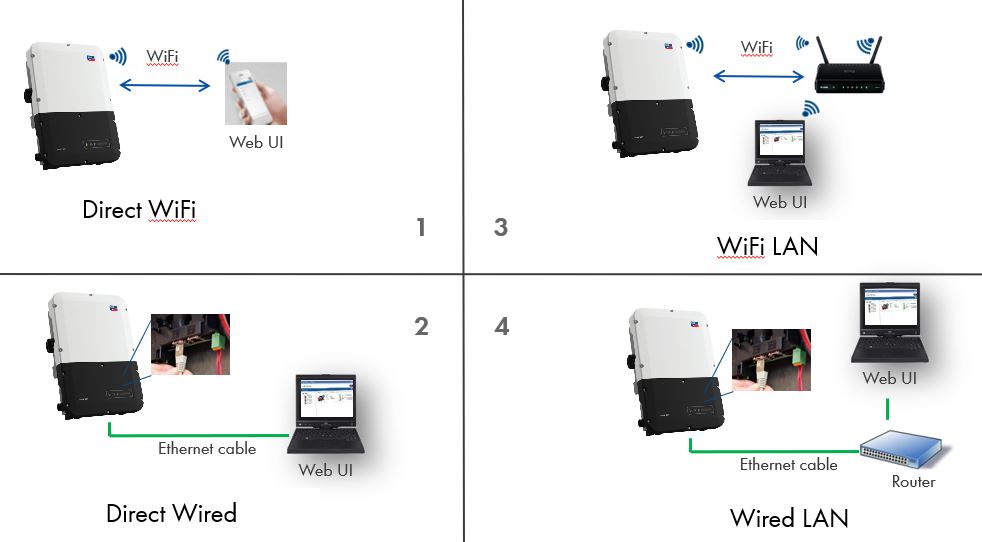
Figure 1. Four methods for accessing the Sunny Boy US user interface – self-hosted WiFi is shown at top right.
To join the device accessing the user interface to the inverter’s Wi-Fi network, the device specific 16-digit code appearing after “WPA2-PSK:” at the bottom of the same label with the serial number must be entered as the network password. If the inverter’s firmware is 3.01.24.R or higher, a window of the device’s default web browser will open, and the login screen for the user interface will appear.
Please note, for firmware versions below 3.01.24.R, a browser window should be opened manually and “192.168.12.3” entered – without quotes – in the address bar. Press enter and proceed past any warnings to get to the login screen for the user interface.
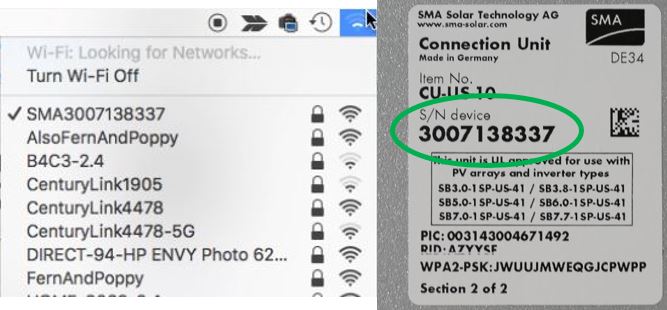
Figure 2. Inverter label with serial number circled (right) and WiFi network name (left)
On the login screen, a display language can be chosen in the first dropdown. In the second, either Installer or User can be chosen for User group. For commissioning, the Installer group should be chosen, as shown in Figure 3.
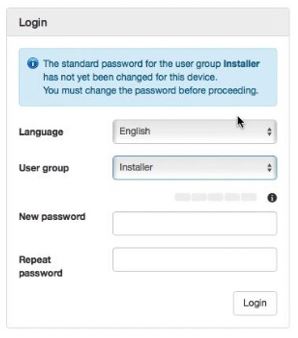
Figure 3. Login screen with Language and User group selected.
A password must be chosen upon first login and there may be specific requirements displayed for the password depending on firmware version. If so, as a password is typed, the requirements that are fulfilled will have the X circled in red next to them change to a green check mark. Once an appropriate password has been selected, it must be verified.
Please note that if the inverter has automatic firmware updates enabled, subsequent login attempts after such an update might be subject to selecting passwords for any unassigned User group. While nothing prevents setting the same password for the User and Installer group, this is not recommended.
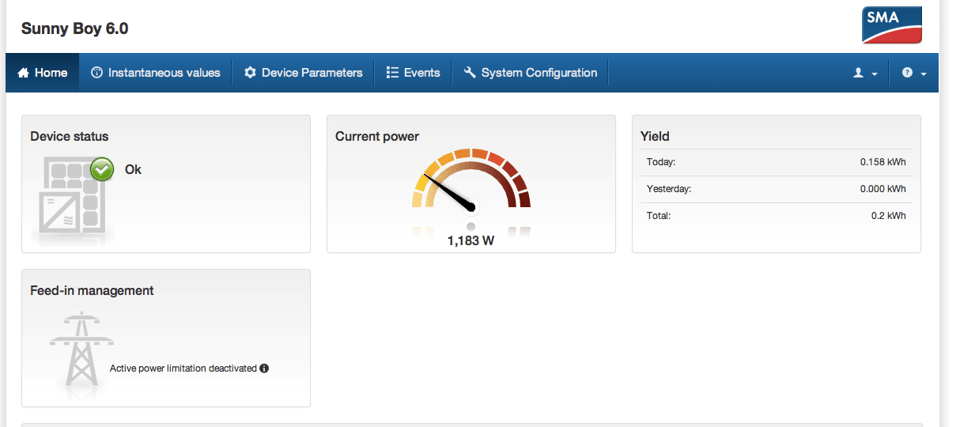
Once the password is entered correctly, the home screen of the user interface will be displayed. The Instantaneous Values menu can be selected to view measured values, the Device Parameters menu chosen to adjust operating parameters, or the Events menu chosen to view recent messages from the inverter.
This easy to utilize method of accessing the Sunny Boy graphical user interface is also documented in the Tech Tip video “Accessing the Graphical user Interface of the Sunny Boy US-41”, watch it now!
, scroll down to “Software,” and download the latest firmware update. Once you’ve completed these three steps, you’ll be fully prepared to successfully continue the commissioning process for the Sunny Boy Smart Energy hybrid inverter. For a detailed, step-by-step guide to commissioning the Sunny Boy Smart Energy, please refer to the following TechTip: TechTip: Commissioning the Sunny Boy Smart Energy (US) with the SMA 360° App If you need further assistance or troubleshooting and would like to request a scheduled callback, please see this article: Requesting a Scheduled Callback for Customers in the US, Puerto Rico, US Virgin Islands, and Canada")

")
I’m trying to access the Sunny Boy user interface after having changed my wi-fi. I was able to find the SMA device on my laptop’s WiFi and to enter the password, but no log-in screen appeared on my computer. What now? I had to shift back to my regular wi-fi connection to send this message.
Hi Jaime! Did you open a browser and typed 192.168.12.3 in address bar? That is needed to see the login screen.
After commissioning our Sunny Boy SB7.0-1SP-US-41, we noticed that the time, month, date, and year were incorrect. We tried the different screens from the menus to adjust without any luck. We can communicate via RJ 45 cable, Direct WiFi, or WiFi LAN to the Sunny Boy. Need to know the correct method for time and date adjustments.
Barry, the second step of the Installation Assistant allows for setting the time and date manually or setting automatic updates. If you are the installer, you can re-run the Installation Assistant and change only settings on screen 2. Please see 3:37-3:49 of the Sunny Boy Commissioning TechTip Video here. You can also contact SMA Service at Service@SMA-America.com